Essa é uma revisão anterior do documento!
Formatador de Relatório - ReportBuilder (Resumo do guia do desenvolvedor)
TUTORIAL DE RELATÓRIOS - B - C
1. Access the Report Designer.
2. Right-click over the white space of the detail band and select the Position… menu option.
3. Set the height to 1.8542.
4. Select View | Toolbars | Data Tree. The Data Tree window should appear. Position it over the Object Inspector.
5. Click the Layout tab at the bottom of the Data Tree and configure the drag-and-drop settings:
Create All
Style Tabular
Label Grid False
Label Font Name Times New
Label Font Style Regular
Label Font Size 10 point
Label Font Color Black
Field Grid False
Field Font Name Times New
Field Font Style Bold
Field Font Size 10 point
Field Font Color Black
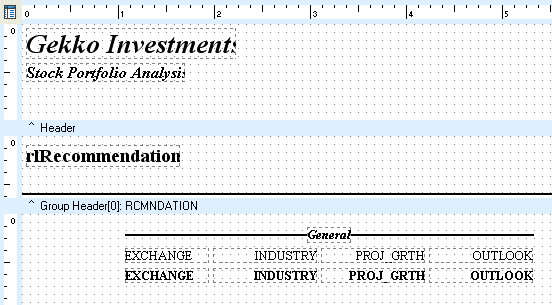
6. Click on the Data tab and use the Ctrl-click method to select these fields in order:
EXCHANGE
INDUSTRY
PROJ_GRTH
OUTLOOK
7 Drag the selected fields into the detail band. Four DBText components and four associated labels will be created.
8 Hold down the Ctrl key and use the arrow keys to position the selection:
Left 1.0729
Top 0.3542
Note: As you move the selection, the position appears on the status bar. Use these measurements to determine when you have reached the position.
9. Place a line above the selection.
10. Configure the line component:
Line Type Top
Thickness 1 1/2 pt
Left Position 1.0729
Top 0.2083
Width 4.2604
11. Place a label component over the line.
12. Configure the label component:
Caption General
Font Name Times New Roman
Font Size 10
Font Style Bold & Italic
Text Alignment Centered
Top Position 0.1354
Transparent False
13. Select the line, then Shift-click the label. Click the Align Middle icon on the Align or Space toolbar.


